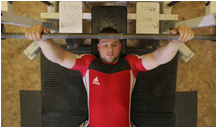
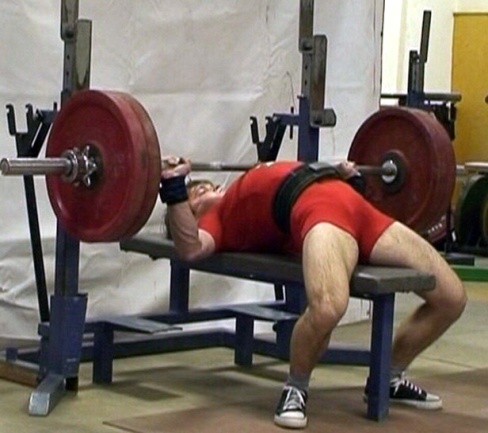
Athlete’s position on the bench (stance, grasp and grip of bar, back span).
The athlete comes up to the bench, lies on his back, ensuring that his head, shoulders, and buttocks are in contact with the bench:
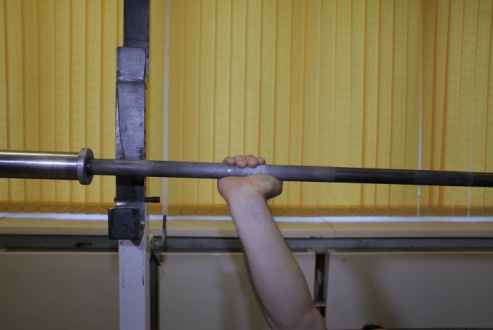
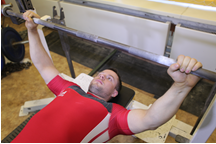
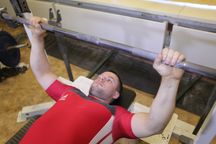
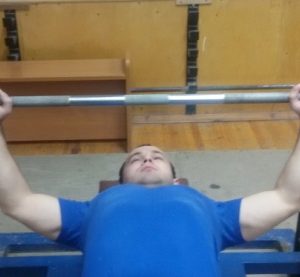
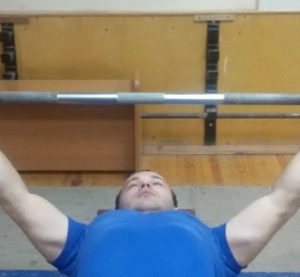
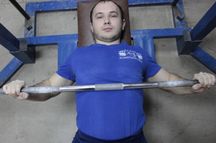
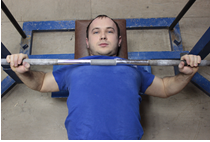
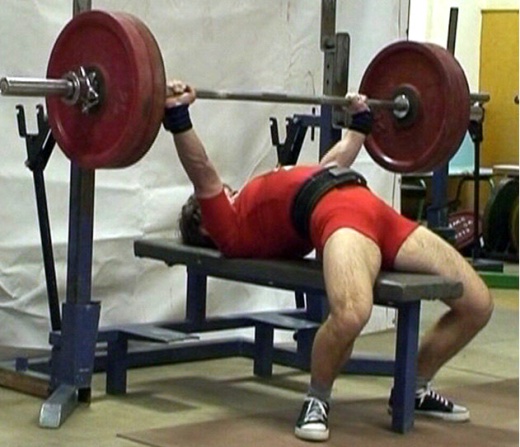
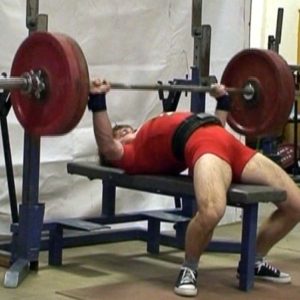
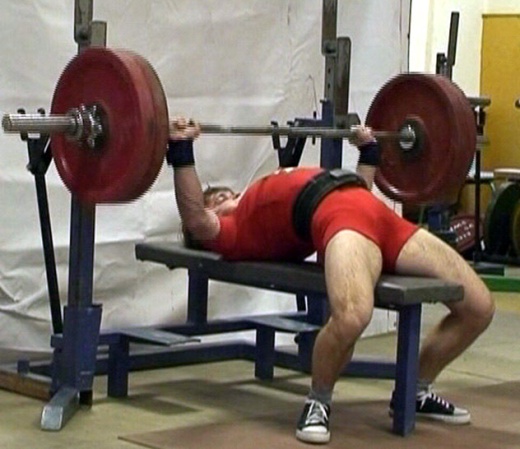
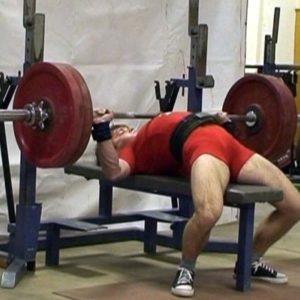
a) the head should be positioned so that the eyes are directly under the bar (photo 1). If the bar is positioned above the eyes level (photo 2), there will be problems with unracking of the barbell. If the bar is below the eyes level (photo 3), racks may be accidentally touched while pressing, leading to unwanted friction or barbell arrest.
-

- 1
-

- 2
-
- 3
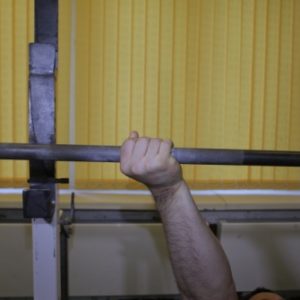
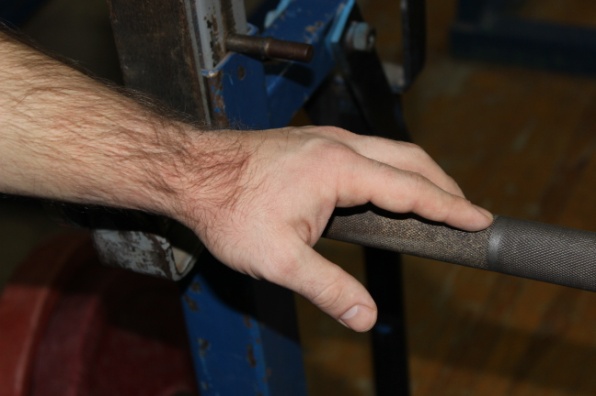
b) grasp and grip of bar: the athlete should use a common grip (photo 4) with four fingers wrapping the bar from one side and the thumb – from the opposite.
-
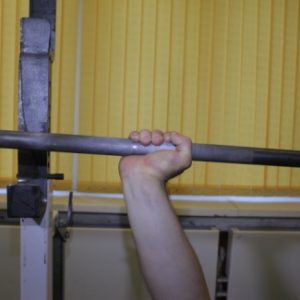
- 4
-
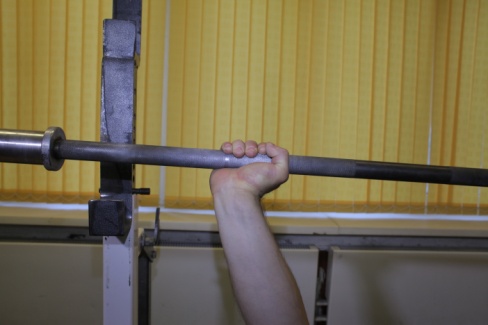
- 5
-
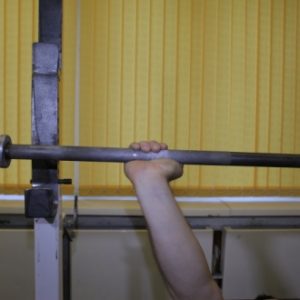
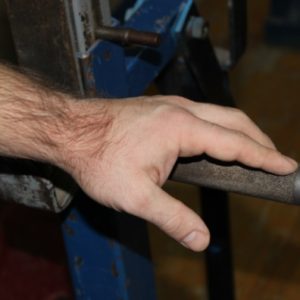
- 6
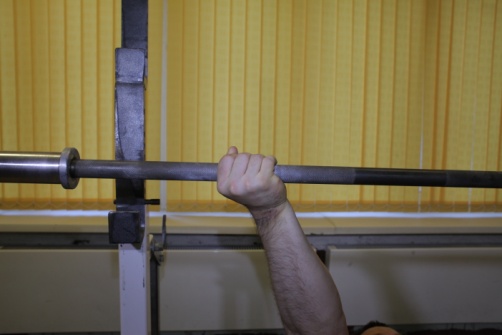
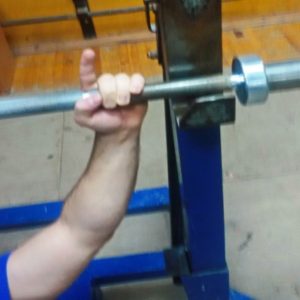
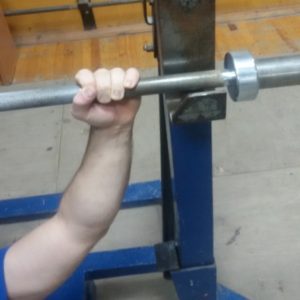
With an overhand grip of the bar (photo 5) all fingers wrap the bar on one side. With an underhand grip of the bar (photo 6) palms are turned towards head. Overhand and underhand grips of the bar are not allowed at competitions by the Russian Power-Lifting Federation due to high risk of injury. Such grips can only be used as an additional exercise during workout.
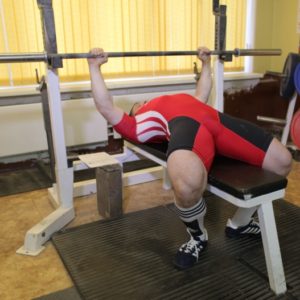
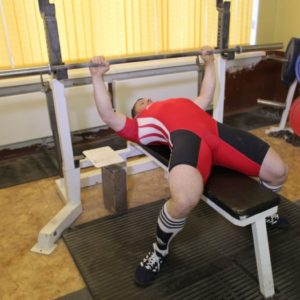
c) athletes use two types of grips for bench pressing: wide (81 cm), i.e. the maximum acceptable width according to the competition rules, with the athlete’s fingers over the mark (photo 7, 8, 9)
All contest and training bars have a mark for the maximum gripping width of 81 cm. According to the competition technical regulations that distance is measured between the index fingers, notably, both index fingers must not come over the marks, but stay inside or, as an exception, above the marks (photo 10).
-
- 7
-
- 8

-
- 9

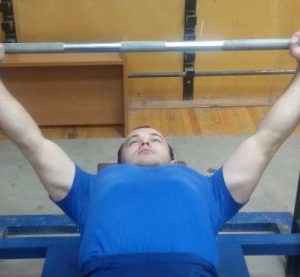
Medium grip (60-65 cm) which more actively involves the triceps and deltoid muscles (Photo 11). The choice of the grip width depends on the length of arms and power potential of chest and shoulder triceps muscles.
-
- 10
-
- 11
The grip width is individual for each athlete. But there is a general rule: the wider the grip, the shorter the way of the bar from chest and the less the physical effort of the athlete, and vice versa, the longer the way of the bar – the more effort is required.
Stance
The stance of the athlete may vary from narrow to the widest base and should be selected individually for each athlete, depending on the flexibility of the hip joint (Photo 12 and 13).
-
- 12

-
- 13

Bar Unracking
It is important that while performing this element, the bar is positioned on the rack at an appropriate height, that would enable the athlete unrack the bar unassisted, not affecting the bridge position (Photo 14). If the bar is positioned too low (Photo 15), the athlete will find it difficult to take the start position, and it will be difficult to unrack the bar.
If the bar is placed high on the bars (Photo 16), the athlete will have to reach out to the bar, changing his start position, and the lumbar span will significantly decrease, while the pressing length is increased.
-
- 14
-
- 15
-
- 16
At competitions unracking, is usually performed with the help of a central assistant (Photo 17). The height of the bar is also an important consideration when taking over the bar from the assistant. The athlete takes an initial position gripping the bar of the bar. By taking the bar over from the assistant, the athlete slightly lifts the pelvis, while moving it forward. Then he puts the pelvis back on the bench. But the front deltoid muscle fascicles must be below the pectoral muscle line.
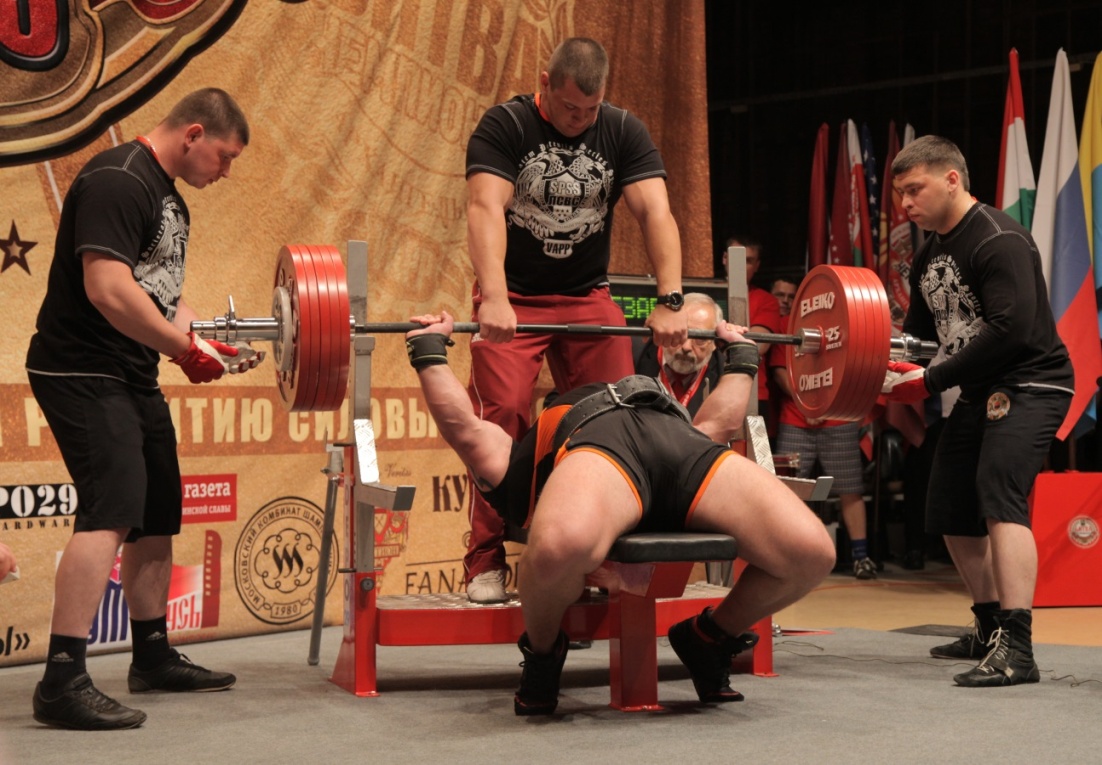
Photo 17. Three assistants, central assistant passes the bar to the athlete into the stretched arms
Initial position
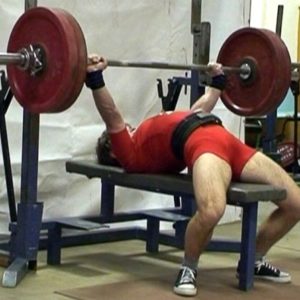
By taking an initial position on the horizontal bench the athlete should try to provide the maximum back span while ensuring that the head shoulders and pelvis (buttocks) stay in contact with the bench (Photo 18 and 19). The more the back is span (the higher the “bridge”), the shorter the way of the bar and the less physical effort is required (i.e. the movement amplitude is significantly reduced). The height of the “bridge” is not limited by the rules of competition and only depends on the flexibility of the lumbar and the thoracic spine. Muscles of legs and back are stressed, the pelvis leans on the bench (Photo 18 and 19).
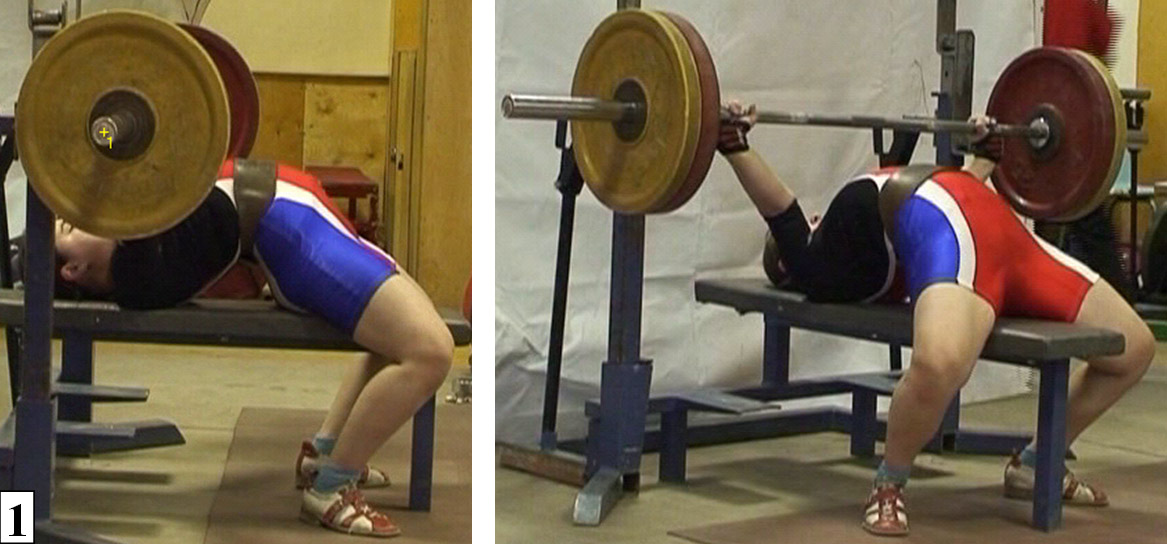
Photo 18 and 19. Initial Position with a “Bridge”
At the initial position, the bar is held with straight arms and begins from the moment of taking over the bar from the assistant and assuming a stationary position by the athlete.
The athlete with straight elbows and the bar held at standstill is waiting for the judge commands to start.
The signal to start pressing is given by the senior judge immediately after the athlete assumes a stationary position.
Lowering of the bar towards the chest
Lowering of the barbell continues from the moment of bending elbows and finishes as the bar touches the athlete’s chest (Photo 20, 21, 22). The time of lowering the implement towards the chest depends on the athlete’s anthropometric data (length of arms), width of grip, height of the “bridge”, speed of lowering and the weight of barbells, and the quality of the pressing muscles.
-

- 20

-

- 21

-

- 22
Having lowered the barbell towards the chest, the athlete must hold it immobile on the chest until the judge commands to “press”.
At first stages of training athletes make a common mistake, lowering the bar at different points of the chest. Athletes should be taught from the start to lower the bar to the same point, i.e. to the lower edge of the chest muscles (Photo 23).
-

- 23
-
- 24
-
- 25
If the bar is lowered much farther than the lower edge of the chest muscles (photo 24), there will be an increased load on the frontal deltoid muscle fascicles and on shoulder triceps, while the work of chest muscles is decreased making it more difficult to press the barbell off the chest.
If the athlete lowers the bar closer towards the neck (Photo 25), it significantly increases the muscle load and makes one’s arms turn out, increasing the load on the lateral deltoid muscle fascicles.
Press
The barbell press starts from the separation movement of the bar from the chest (from the moment of straightening the arms in elbow joints and ends with the maximum straightening of the arms in the elbow joints (Photo 26, 27, 28).
After the senior judge commands to “press”, the athlete makes an explosive effort, developing the maximum speed of the barbell in the upward direction. The task of the athlete is to maintain the maximum barbell motion speed.
-
- 26
-
- 27
-
- 28

Make sure that you straighten both arms at elbow joints simultaneously.
Lock of the barbell in the final position
Lock of the barbell begins after complete simultaneous straightening of both arms in elbow joints and continues at a fixed position until the senior judge commands to put the barbell back to the racks (Photo 29).
-

- 29

Putting the barbells back to the racks
After the senior judge commands “to the racks” the athlete has to return the barbells back to the racks either unassisted or with the help of assistants.